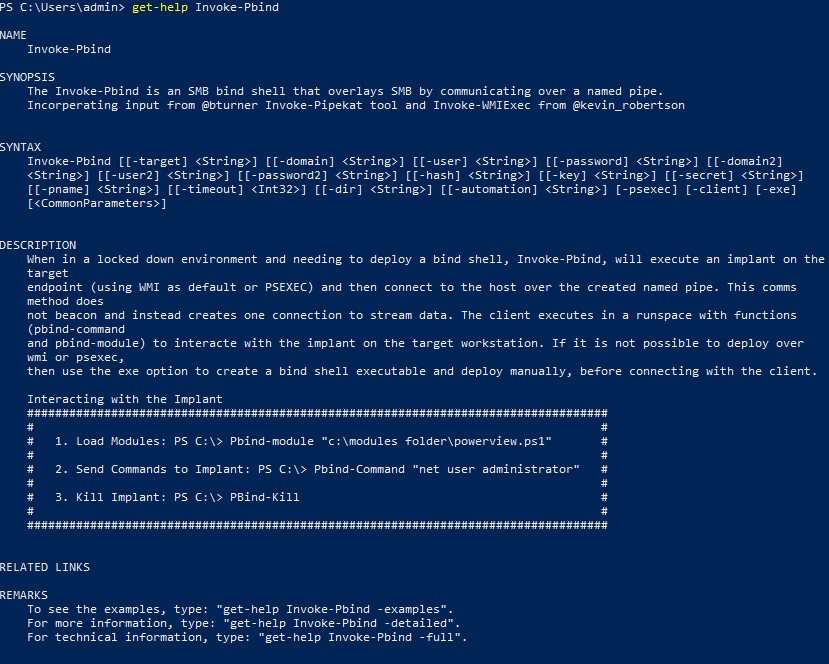
Invoke-Pbind is a mini post exploitation framework written in PowerShell, which builds C2 communications over SMB named pipes using a push rather than a pull mechanism. Pbind was initially created to overcome lateral movement problems, specifically in restricted environments where the server VLAN could not directly talk to the user VLAN (as it should be in every environment). The tool was designed to be integrated with any C2 framework or run as a standalone PowerShell script.

Video Demonstration
If you just want to skip to the video tutorial, then you can find that here and at the end of this post.
The Problem: Segregation and Strict Firewalling
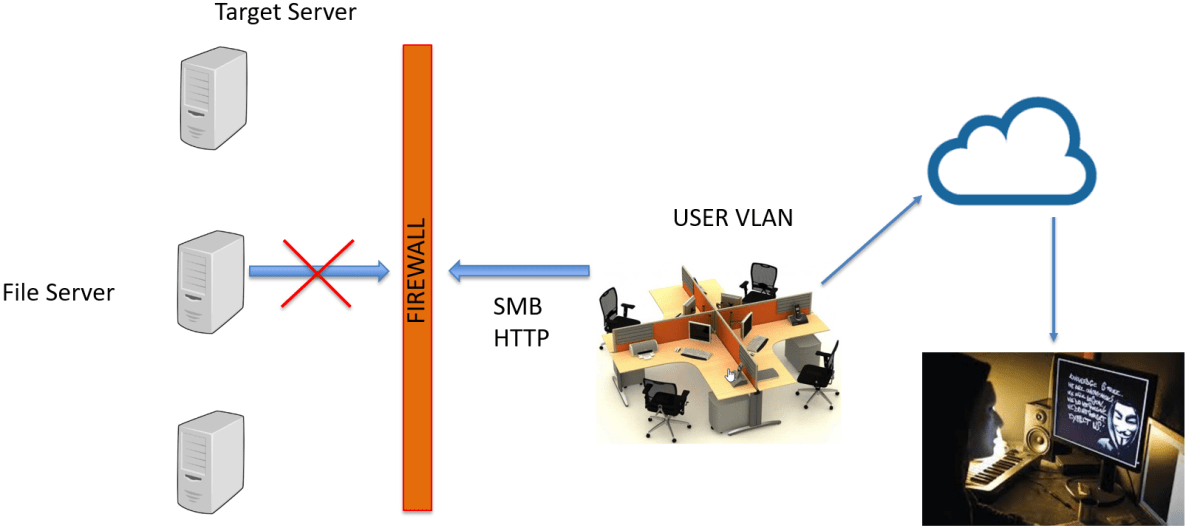
This is useful when you have compromised an organisation and have C2 comms over HTTPS, traversing the corporate proxy server out of the network from user’s workstations, but the target dataset that you are looking to obtain is located down server VLAN with a firewall restricting both inbound and outbound traffic. In that scenario, firewall rules are always going to allow for specific traffic to traverse over pre-approved services. The following diagram illustrates one such situation, where the environment allows limited services from the user VLAN to the server VLAN, but allows no ports in the reverse direction.

What options exist for C2 comms
The following are some options for C2 comms and their mitigations, resulting in failure.
| Method | Mitigation | Result |
| Direct Internet Access | Blocked by Firewall Outbound | Fail |
| Traverse Through HTTP Proxy | Blocked by Firewall Outbound | Fail |
| TCP Reverse Shell | Blocked or likely detected scanning for open ports | Fail |
| TCP Bind Shell | Blocked by Firewall Inbound or service running on open ports, no closed ports detected | Fail |
| ICMP | Blocked by Firewall Outbound | Fail |
| Daisy over SMB in User VLAN | TCP port 445 blocked from servers to workstations | Fail |
| Daisy over HTTP in User VLAN | Same as standard reverse all blocked ports | Fail |
| DNS | Authoritive DNS is only permitted by the Proxy server, thus not possible for C2 comms from the server VLAN. | Fail |
To be clear, at this point the problem isn’t about getting execution, it’s about having reliable C2 comms that afford the user output for all commands executed and to use the implant as a foothold or staging point to further attacks against servers in the restricted environment.
The Solution
“A named pipe is a logical connection, similar to a Transmission Control Protocol (TCP) session, between the client and server that are involved in the CIFS/SMB connection. The name of the pipe serves as the endpoint for the communication, in the same manner as a port number serves as the endpoint for TCP sessions. This is called a named pipe endpoint.” – https://msdn.microsoft.com/en-us/library/cc239733.aspx.
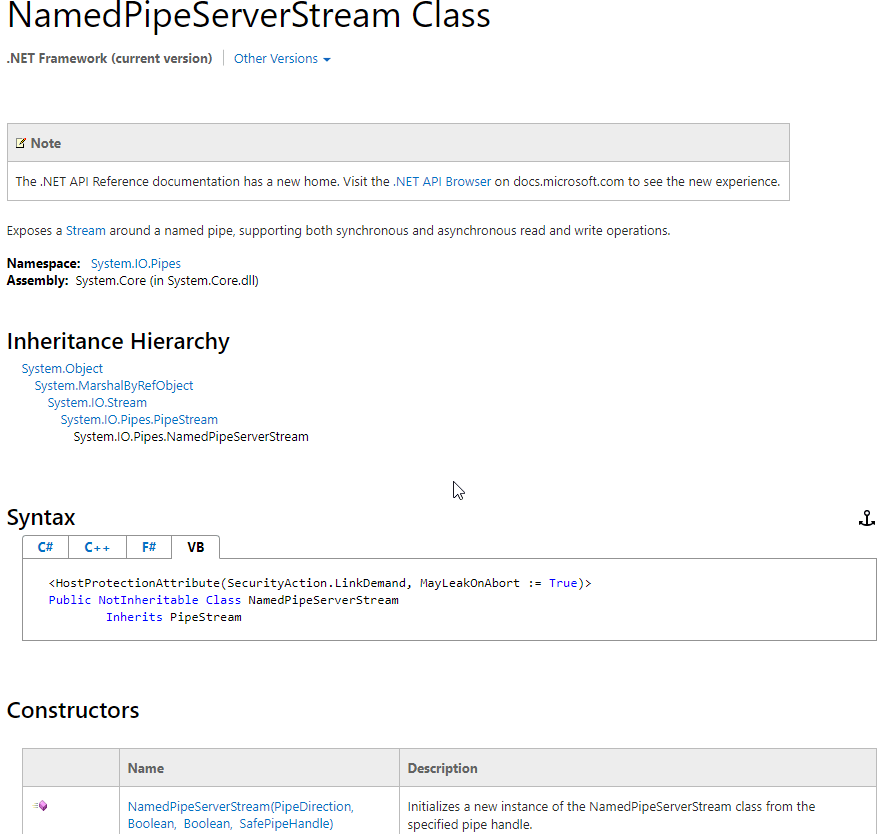
.NET has a class for creating and interacting with named pipes:

Where TCP port 445 is open into a server environment, we can overlay the SMB protocol and use a named pipe to share data between the workstation and server, providing a method for exchanging data (comms). The following commands make up the basis of creating a named pipe with an access rule that allows “everyone” access:
add-Type -assembly 'System.Core‘
$PipeSecurity = New-Object System.IO.Pipes.PipeSecurity
$AccessRule = New-Object System.IO.Pipes.PipeAccessRule( 'Everyone', 'ReadWrite', 'Allow' )
$PipeSecurity.AddAccessRule($AccessRule)
$Pipe = New-Object System.IO.Pipes.NamedPipeServerStream($pname,InOut,100, ‘Byte', 'None', 4096, 4096, $PipeSecurity)
Since the days of abusing IPC$ with anonymous access (CVE-199-0519), and RID cycling your way to a plethora of goodies, Microsoft have said “no – though shall not pass” – non Microsoft direct quote. In a domain environment, any user can create a domain authenticated session to the $IPC share, which can then be piggy backed to gain access to the named pipe. Here is a simple script in PowerShell to create an authenticated session. One quick problem to overcome: While the ‘AccessRule’ applied to the pipe may look like it allows “everyone” access to the named pipe, this is not actually the case.
$net = new-object -ComObject WScript.Network
$net.MapNetworkDrive("", "\\target\ipc$", $false, “domain\user", “password")
Interacting with a named pipe is also fairly straight forward as long as you know the data type of what is being read; as we create the server we know how to handle to pipe as shown by using a simple StreamReader:
$pipeReader = new-object System.IO.StreamReader($pipe)
$PRead = $pipeReader.ReadLine()
$pipeWriter = new-object System.IO.StreamWriter($pipe)
pipeWriter.WriteLine($encCommand)
Design
When we came up with Invoke-Pbind, the following principles were implemented.
Client/Server Model
To allow for inclusion in a C2 framework, two script blocks were created, client and server. The server starts and sets up the named pipe on a remote target (server). The client then connects to the named pipe and exchanges messages over TCP port 445 (SMB). The client runs through an existing C2 implant and by using script blocks and run spaces, it is possible to use the client non-interactively for better interaction with most C2 frameworks.
Token Passing
When sharing a common space such as a named pipe, it is imperative that messages exchanged between the client and server are not overwritten prior to being picked up by their counterpart. Control messages are used in combination with TRY and IF statements to create rules for when a client or server should read or write from the named pipe.
Security
During the generation of the script blocks, at run time, a unique key is generated and used to encrypt messages between client and server. Pbind supports AES 256 encryption. To initiate a connection to the named pipe from a client, a shared secret is also supported to stop tampering with the named pipe. If the client does not provide the correct secret, the named pipe will close.
Injection/Execution
There are two main methods included that inject the implant into target hosts. These are modified versions of Invoke-WMIExec and Invoke-SMBExec (credit to Kevin Robertson for these scripts); both scripts have been updated to support passing passwords, where previously they only accepted hashes for authentication. The implant is a self-executing script block that is passed as the payload. The script runs WMIExec by default but contains a switch parameter to invoke SMBExec:

To provide additional deployment flexibility the script also includes an exe method. This method uses CSC and Windows .Net automation DLL to compile the implant into an executable that can then be deployed and executed through any means.
NOTE: Creating a named pipe does not require administrator credentials so the executable can be run as a non-privileged user. On the other hand, WMIExec and SMBExec require administrator privileges.
The exe option continues to generate unique variables that are hardcoded into the executable, for use in cryptography and such like. The exe option can be used offline to create an executable implant and is not tied to an interactive session through a C2. To talk to the implant, the script supports a CLIENT option that is used to interact with a deployed implant, the options for which are provided when the implant is compiled:

This flexibility allows for the deployment through any means:
- DCOM
- RDP
- Shared Folders
- WinRM
- SCCM
- Anything……
There are a number of options that are configurable. If no options are selected, the script reverts to pre-set or randomly generated values. The following options are configurable:
- KEY – Defaults to a randomly generated AES 256 Key – Allows for a key to be specified, commonly used in client mode.
- SECRET – Defaults to random 5 character value – Allows for specific secret to be used.
- PNAME – Defaults to random 8 character value – Allows for specific pipe name to be chosen.
- TIMEOUT – Defaults to 60 second – Used to change the wait time for the client to connect to the Implant, used in slow networks.
- EXE – Generates a stand-alone executable;
- CLIENT – Runs the script in client mode to connect to a deployed Executable;
- TARGET – used to specify a remote IP Address.
- Domain/User/Password/Hash – used to provide credentials for authentication.
- Domain2/User2/Password2 – used to map a drive to the target system, when a hash is being used as the primary authentication mechanism.
- Dir – used in EXE mode to output the generate executable.
- Automation – used in EXE mode, directory location of the Automation DLL.
Interaction
There are 3 main functions that have been created to interact with the implant from a client. The first and probably the most useful, especially when we introduce templates, is Pbind-Command. This simply registers a command in a variable that is read in by the client and passed to the implant (server) before being executed. A simple example is shown below:
Pbind-Command “net user doug password /add”
Pbind-module c:\folder\powerup.ps1The second is Pbind-Module, which allows you to read in any other ps1 file and have it injected into memory on the implanted host. Pbind-Command can then be used to execute any of the functions in the ps1 script. This has a limitation and does not work well within a C2 setup, because all scripts have to be local to the client. In most cases the client is already running on a target workstation and would require all scripts to be uploaded to the client before being sent on to the implant.
Pbind- Command “Invoke-AllCheck”
Pbind-Squirt was a designed to help resolve the limitations of Pbind-Module. The idea for this function was to embed a number of scripts as base64 objects into the script that can then be called and auto executed into memory on the client. The only one that has been embedded is PowerUp, to assist with asset review on newly implanted hosts.
Pbind-Squirt powerup
However, in practice neither Pbind-module nor Pbind-squirt were optimal and instead a new solution was constructed, called ‘Templates’. Effectively this was just a better way to interact with the Pbind-Command function. It was decided that by creating a number of small scripts which can automate tasks, it is possible to carry out similar ideas to Pbind-module and Pbind-squirt. Tasks such uploading mimikatz and extracting passwords, uploading PowerView and running queries or uploading invoke-SMBExec and attacking other machines, can all be scripted using a similar template to the one below:

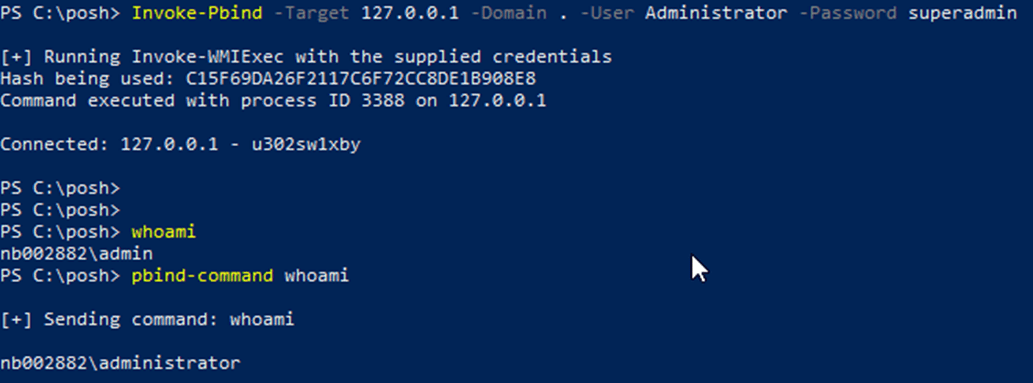
The best way to see how the script runs is to download the script and have a go. The screenshot below shows a simple example of running the script locally under the context of another user, while also executing commands.

Video Tutorial
We have created a video tutorial to help illustrate the use of Invoke-Pbind.
Download
![]() GitHub: https://github.com/nettitude/PoshC2/blob/master/Modules/Invoke-Pbind.ps1
GitHub: https://github.com/nettitude/PoshC2/blob/master/Modules/Invoke-Pbind.ps1


